The Best AI Video-to-Blog Converter I’ve Ever Used
I just used VideoToBlog to turn my video into a blog post, and I was blown away by the quality.

It has the screenshots and everything! Normally, this would take an hour or two, but now it took just 15 minutes.
Let me show you how it works and how you can do this, too.
Disclaimer: This article is reader-supported. If you choose to pay for the tools listed in this article, I might earn a small commission at no cost to you.
How to Use VideoToBlog
Let’s create a blog post from a video.
Here’s my video related to bird-watching that I will use as input. (Remember that it’s important to use your own videos only.)
First, you need to sign up to VideoToBlog.
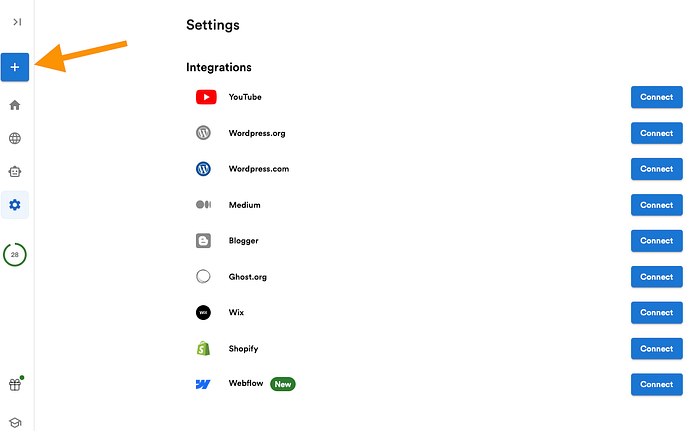
Click the + icon on the Dashboard.
Add the video link to the view:
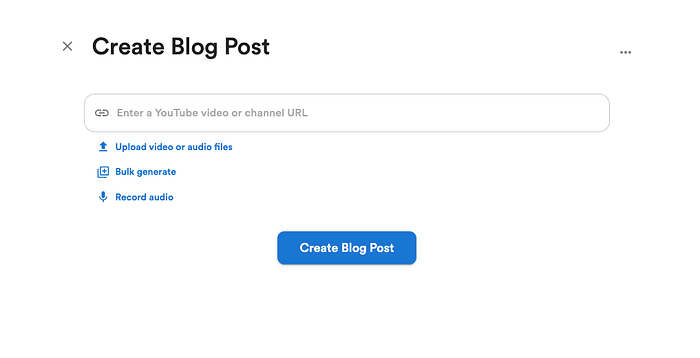
The AI takes a second to find it.
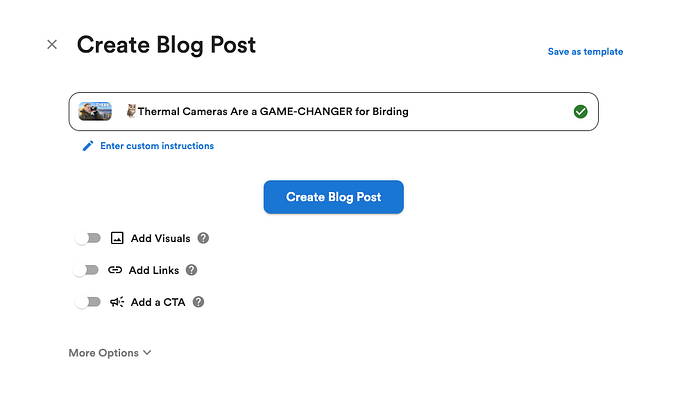
Then, either generate the post or tweak the settings and then generate.
I recommend doing the latter because the more inputs you give, the better the output.
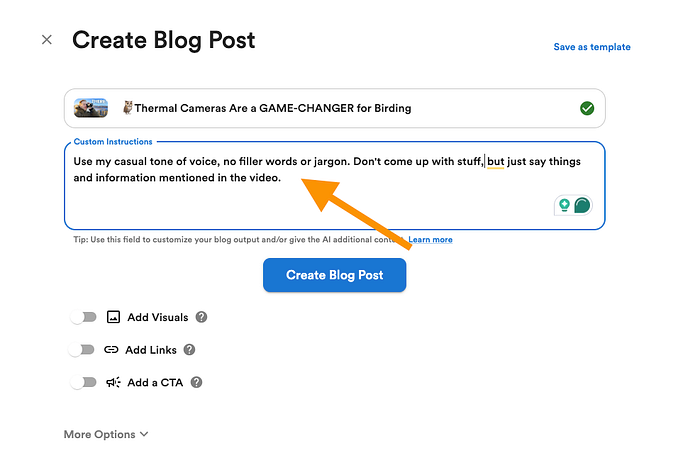
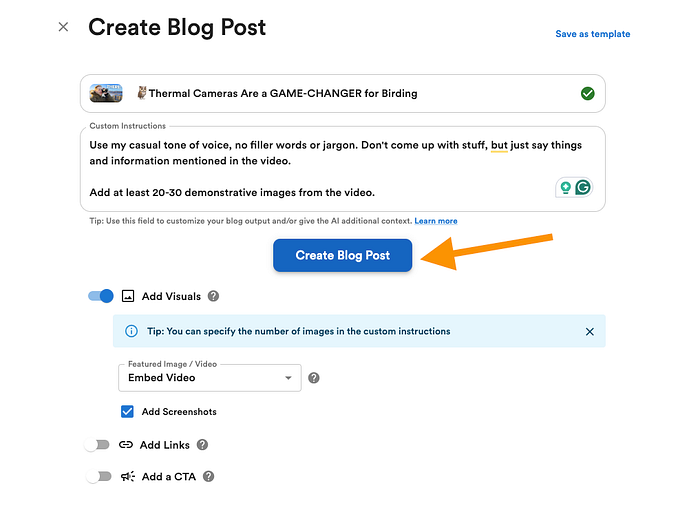
I told it to use a casual tone of voice, leave out jargon and filler words, and not add any information but use the information from the video only.
As I’ve told many times on my channel, I think a blog post without visuals (or with Unsplash/AI-generated visuals) is worth nothing. Also, based on my experience, I’ve never earned a dollar from those “text-only” posts that just regurgitate stuff.
Every blog post should “add to the internet.”
One of the best ways to do this is by using unique and original visuals that nobody else has used before. That is, of course, by taking visuals from your videos and adding those to blog posts.
To auto-add visuals to your blog post, just select the “Add Screenshots”.
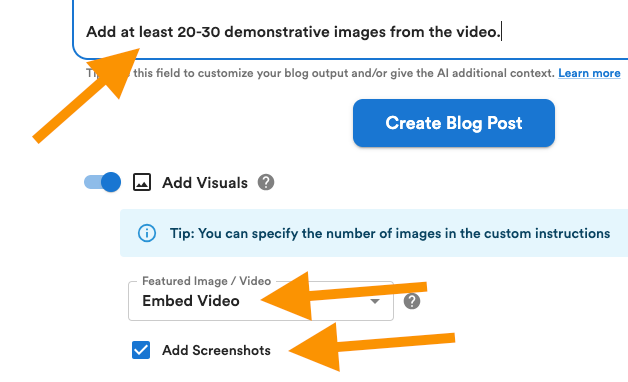
Don’t forget to tell the AI how many images you want it to add in the Custom Instructions section.
I told the AI to add at least 20–30 images because I think that a good blog post is something where there’s no section that’s just text. To keep the readers engaged, there has to be a lot of unique visuals.
Also, remember to check More Options.
For example, I chose an “informal” writing style from More Options.
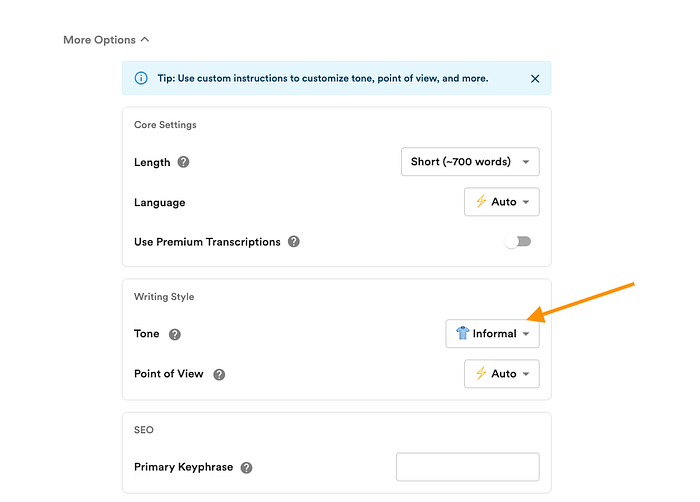
I left other advanced settings untouched.
Then, hit “Create Blog Post” to start generating the post from the video.
After about 2 minutes, the AI-generated article was ready.
Here’s what it looks like.
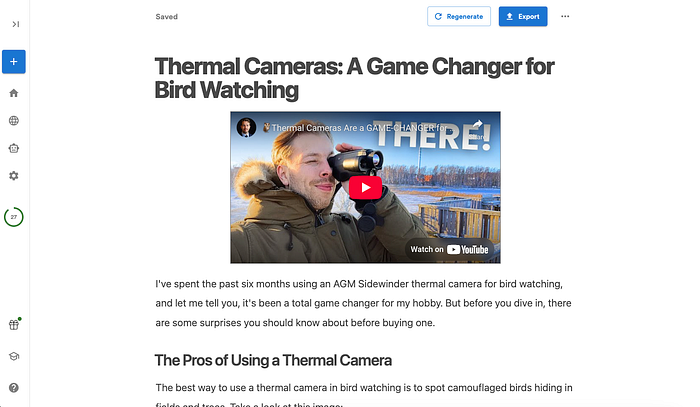
The intro looks decent, the title is good, and the video is embedded nicely.
But thus far, it’s nothing too impressive, right?
But let’s scroll down a bit.
Look at this:
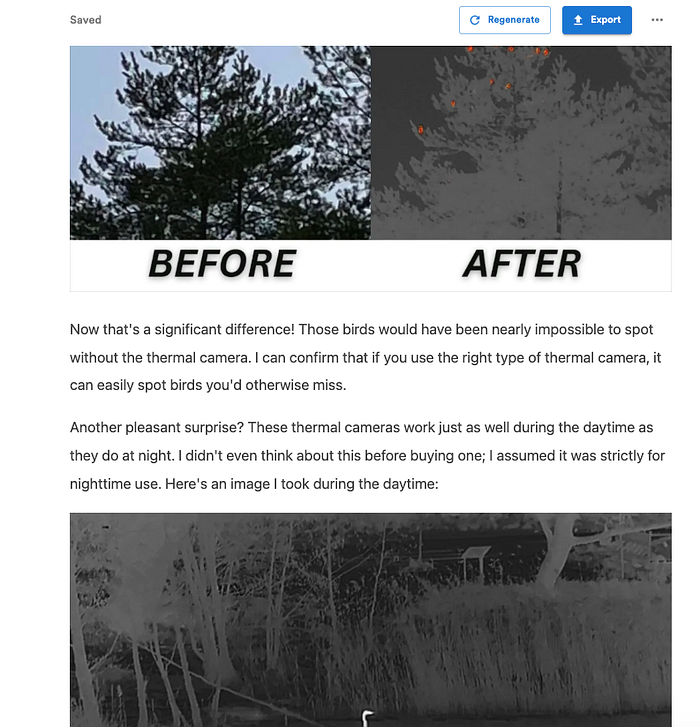
The AI took the right images from the right spots of the video.
This is crazy.
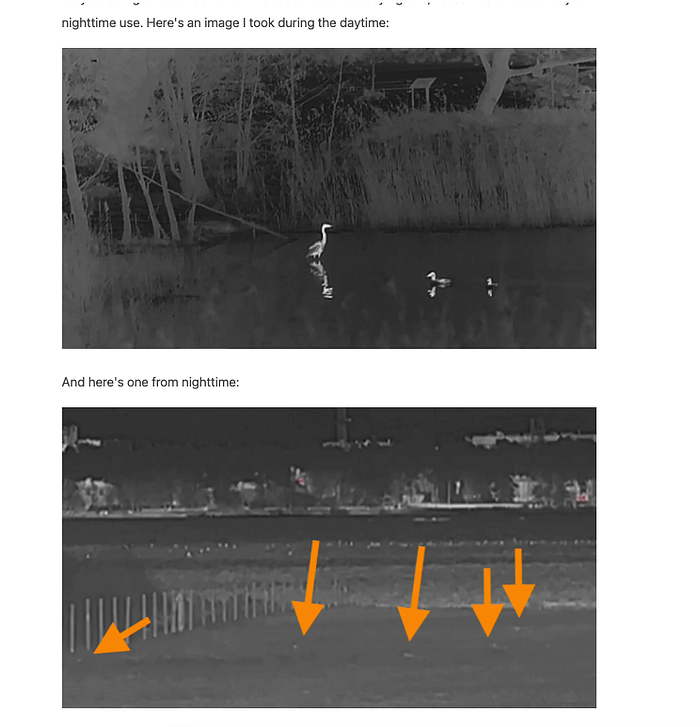
Obviously, there were some small issues I had to fix.
For example, here, the nighttime and daytime images are in the wrong order. But that’s just 10 seconds of extra work for me.
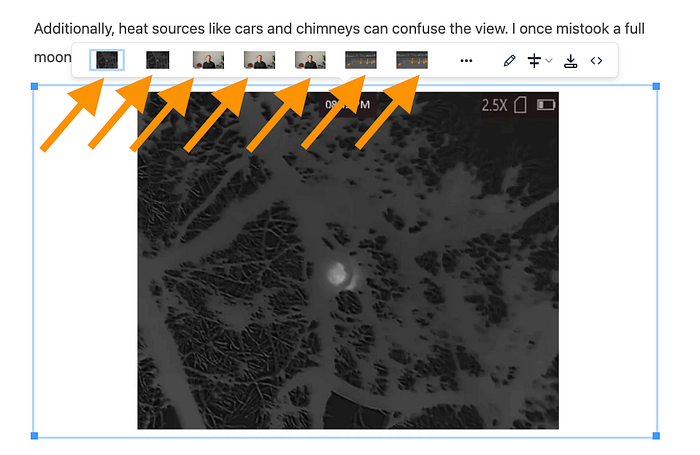
Speaking of edits, the VideoToBlog AI platform is also a full-on blog post editor.
You can tweak all the settings you’d normally do in any other blogging platform.

If you spot an incorrect image, just click on the image and choose the right one from the AI-captured screenshots.
This is a well-thought-out piece of software. I wonder how big a team of creators they have tested this product with. It seems that in every step, it does exactly what I wish it did.
Get Artturi Jalli’s stories in your inbox
Join Medium for free to get updates from this writer.
For example, if you aren’t happy with the screenshots that the AI chose, you can use the video screenshot scrub feature to insert any frame from your video to the post.
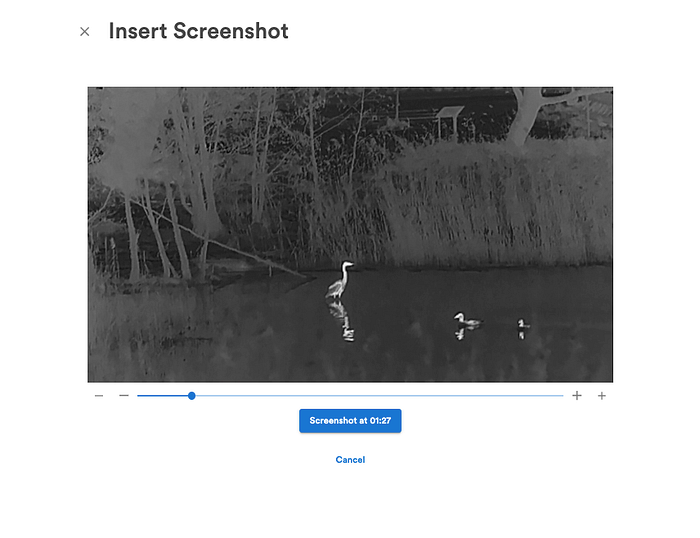
This feature alone would be super useful because you don’t need to take screenshots anymore. The scrub bar allows you to choose 0.1 s intervals, so you’re guaranteed not to miss screens.
Also, the VideoToBlog editor has a forward-slash content block feature similar to WordPress.
For example, if you want to insert a screenshot anywhere, type in “/” and screenshot.
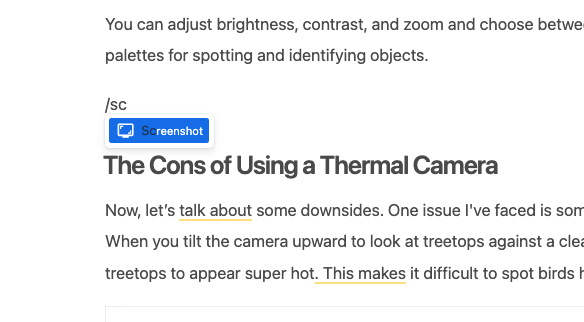
The AI-generated post is not 100% perfect, though. Some screenshots are in the wrong spots, and some text is not in my style.
But this is 80-90% of the way there.
In fact, it only took me 10 minutes to fix the above blog post to something I can publish! If I generated a post like that from scratch, it would take hours.
Once your VideoToBlog post is ready, you can export it to your website, including WordPress, Medium, or just a plain old HTML file.
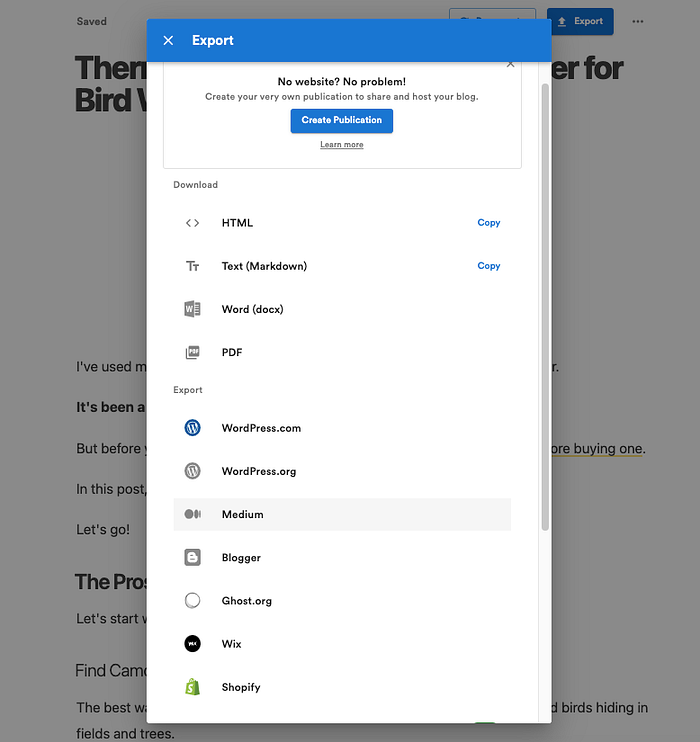
To export directly to one of the platforms, such as Medium, you have to create an integration token. (I just copy-pasted the post as-is because it was way faster, and it didn’t break anything.)
👉 Try VideoToBlog AI free
By the way, here’s the post I created with VideoToBlog AI.
Pros
- Really easy to use: Just copy-paste a link to the video and generate. Tweak the settings to include screenshots from the video, etc.
- Fast. Even when I asked the AI to add screenshots to the video, it only took 1–2 minutes to complete an 8-minute video to a post.
- Lots of practical features: You can customize posts, regenerate content, add links, do SEO stuff, and integrate with blogging platforms.
- Screenshot selector: This tool lets you view your video in a mode where you can choose a frame and take a screenshot of it with a single click and insert it into the post. I have to admit, I’ve always wanted a feature like this, but I didn’t believe that it would exist until I saw it here.
- Intuitive editor: Forget the video-to-blog converter, and this tool would still be a good blog post editor—better than the WordPress native editor, for example.
Cons
- Screenshot Selector freezes: Sometimes, when I choose a screenshot with the selector, it doesn’t update the corresponding frame to the view. (It shows up in the tiny video scrub preview, though.)
- Bad results without input: If you just tell the AI to convert a video to a post, it will be just as useful as doing it with ChatGPT. Make sure to add some custom instructions, tell it to use images, and such.
Pricing
👉 Try VideoToBlog AI free
Key Features
Before capping it off, here’s a short summary of the core features of this tool:
- AI Content Generation: turns your videos into readable blog posts instantly
- YouTube Integration: connect your channel and grab vids in one click
- Upload or Record Audio/Video: works with any file or direct recording
- Bulk Blog Generation: create multiple blog posts at once
- Automation from YouTube: auto-generate blogs when new videos drop
- Custom Instructions: tell the AI exactly what you want it to do
- Tone & POV Customization: match your vibe and writing style
- Auto Screenshots & Visuals: add images/screenshots automatically or manually
- FAQs & Table of Contents: structure long blogs fast
- SEO Optimization: handles meta tags, keywords, readability, all of it
- Social Media Promotions: generates shareable content for every platform
- Export to WordPress, Medium, etc.: one-click publish wherever you need
Final Verdict
As a video creator, you should not rely on one platform like YouTube but post on other platforms like TikTok and Instagram.
That’s easy—just repost the videos on other platforms.
But a huge missed opportunity is in converting videos to blog posts.
I’ve had millions of people read my blog posts in the past, and I’ve made hundreds of thousands in affiliate commissions from my posts.
Thanks to tools like VideoToBlog AI, you can now turn videos into blogs without any experience.
You have to give it a try.
